Before we start
I'm going to walk you through the full setup — booking form, virtual email, availability, AI rules, and rates. It sounds like a lot. It's not. Most of it is clicking things and typing a few words, and you'll have a working system by the time you finish your coffee.
If you get stuck on anything, reply to the email that brought you here. I'll help personally.
Step 1: Create your booking form
In the sidebar on the left, click Forms. Then click the New Form button in the top right. You'll see a few templates:
- Essential Booking Form — this is the one I'd start with. It comes pre-loaded with name, email, phone, date/time, encounter type, screening method, referral source, and a message field. It's the form I use myself.
- Detailed Screening Form — if your screening process is more involved and you want dedicated fields for references, employment, or ID verification.
- Quick Contact Form — just name, email, and a message. Good for a "get in touch" page, not great as your main booking form.
Pick the Essential Booking Form. Give it a name — "Book a Date with [Your Name]", "Booking Request", whatever fits your brand — and click Create.
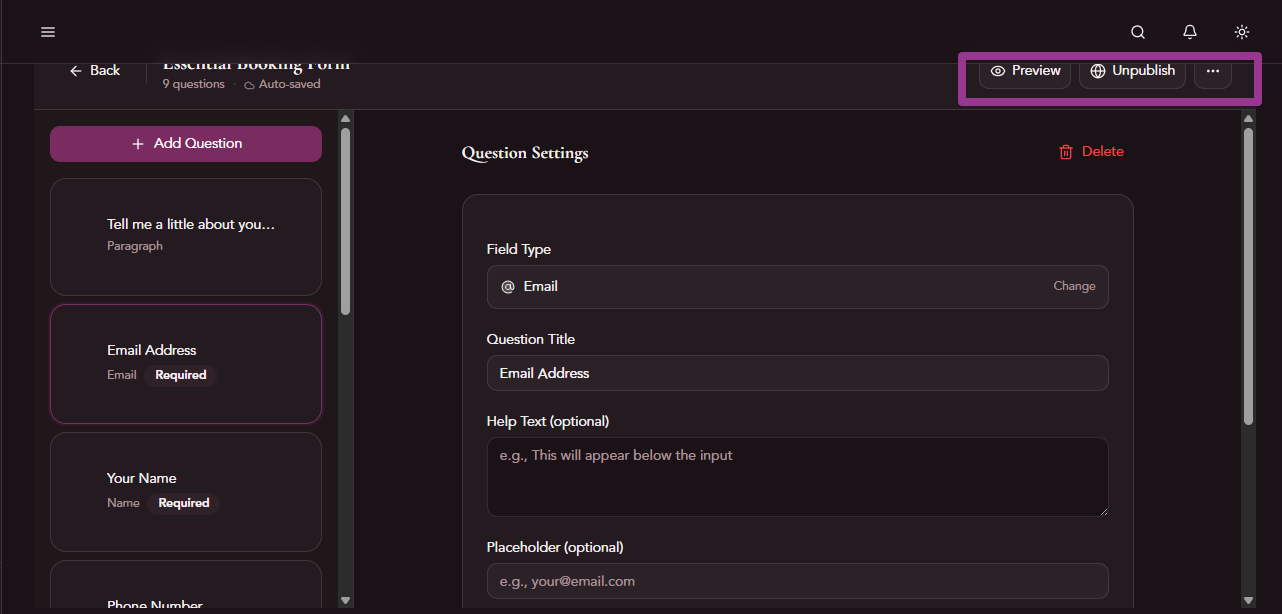
You'll land in the form editor. You can drag questions around, delete ones you don't need, or add new ones. The form is yours — make it match your workflow.
Make it look like you
Here's the part most girls skip and then come back to later: theming.
Go back to Forms in the sidebar. Find the form you just created, click the three-dot menu (⋮) on the right side of the form card, then click Settings.
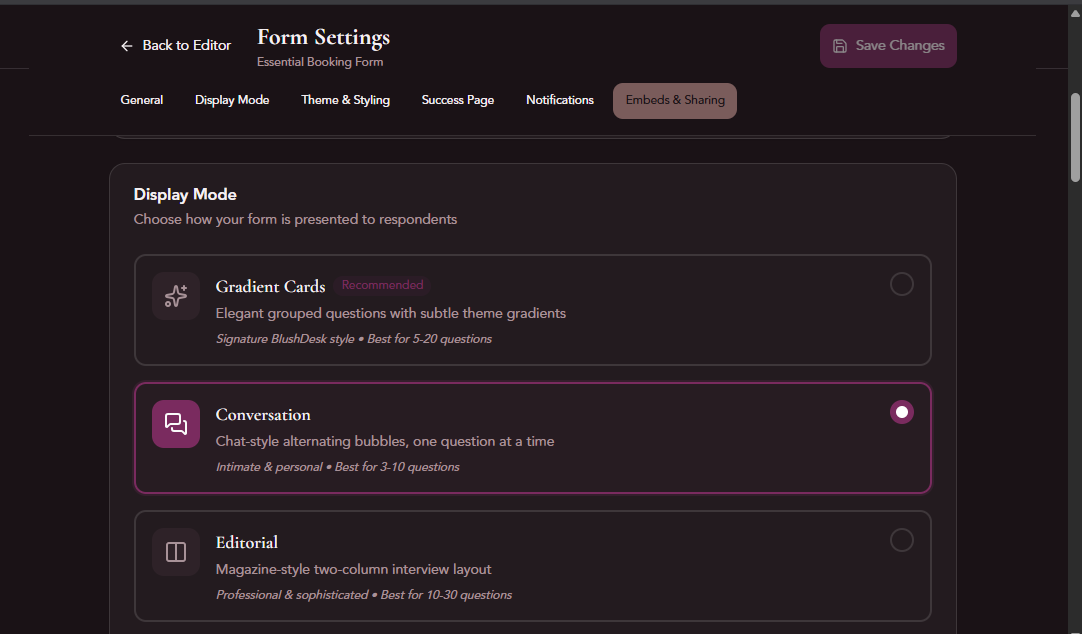
You'll see a page with three sections — scroll down to Display Mode and Theme & Styling.
Display modes change the layout of your form:
- Gradient Cards — the default. Clean grouped sections with subtle gradients. Works well for longer forms.
- Conversation — my current favourite. It shows one question at a time in a chat-bubble style. Feels personal and intimate. Clients seem to like it because it's less intimidating than seeing all the questions at once.
- Editorial — magazine-style two-column layout. Professional and polished. Good if you're going for a luxury feel.
- Timeline — vertical progress ribbon. Nice for forms with distinct sections.
- Layered — dramatic with depth and 3D effects. Bold.
- Classic — everything on one page. Simple, fast, no frills.
Themes control the colours, fonts, and overall vibe:
- Velvet — the signature BlushDesk look. Plum and rose tones.
- Opulence — rich golds and deep backgrounds. Luxury.
- Rose — soft pinks. Feminine and warm.
- Mono — black and white. Minimal.
- Noir — dark dramatic, crimson accents. My personal pick.
- Exotic — warm, tropical-inspired palette.
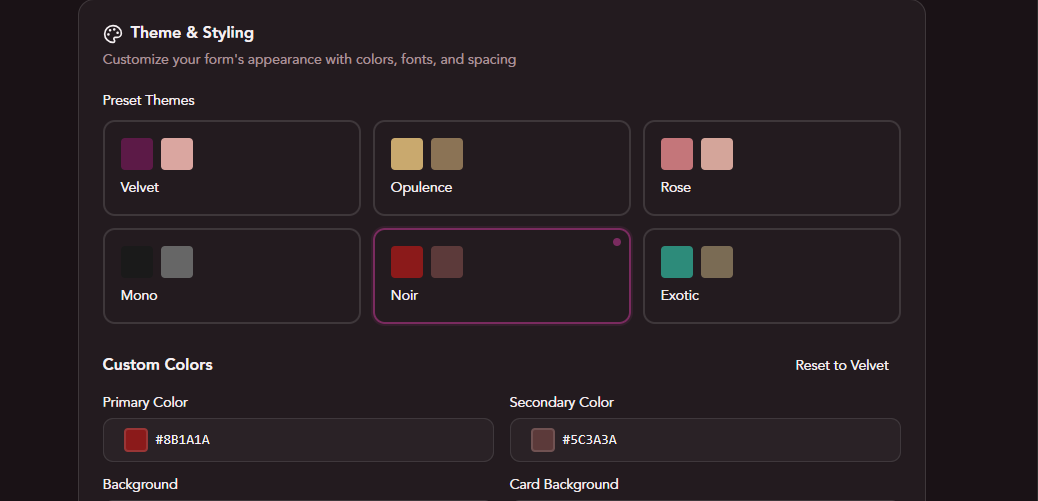
My go-to combo right now is Conversation + Noir. Dark background, one question at a time, feels like a private exchange rather than a form. But play with it — the preview updates live so you can see exactly what your clients will see.
When you're happy, hit Save at the top. Then go back to Forms in the sidebar and publish your form. You'll get a shareable link you can put on your website or send to clients.
Step 2: Set up your virtual email
Click your name in the bottom left of the sidebar — that takes you to Settings. You'll see a grid of cards. Click the Concierge AI card.
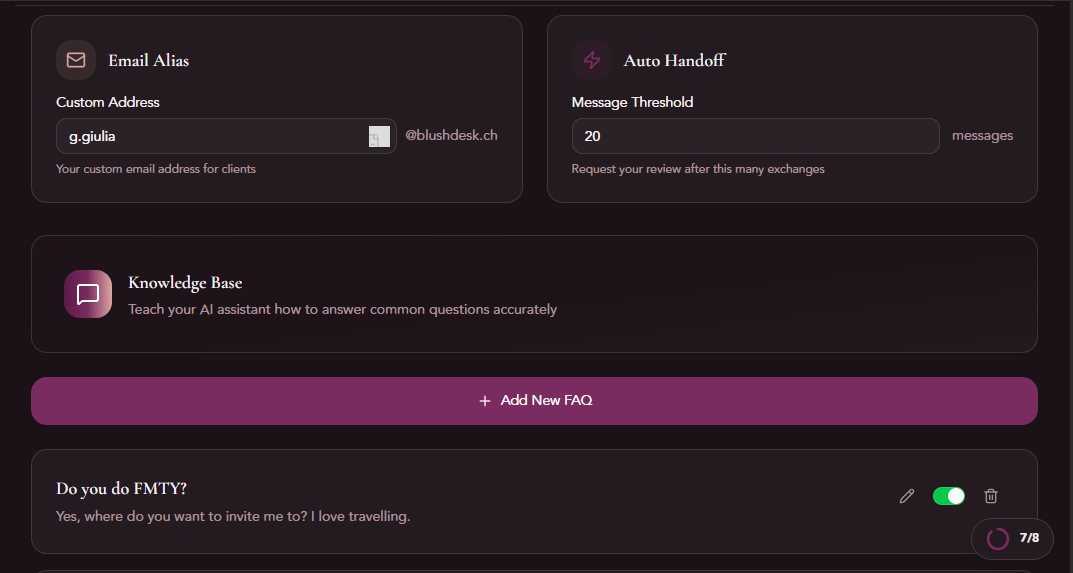
Near the top of the Concierge page, you'll see the Email Alias section. Type in the name you want — yourname@blushdesk.ch. That's it. You now have an encrypted email address hosted in Switzerland that no platform can deactivate, no provider can ban, and no one — including me — can read.
When a client emails this address, it lands directly in your BlushDesk Inbox (in the sidebar) alongside your form submissions. Everything in one place.
If you've turned on the AI concierge (more on that in Step 4), it can read and reply to emails automatically — answering FAQs, providing your availability, filtering out obvious time-wasters. If you'd rather handle emails yourself, just leave the AI toggled off and use the inbox manually.
Step 3: Set your availability
Click your name in the bottom left of the sidebar to go to Settings, then click the Availability card.
This tells both the booking form and the AI when you're available. Clients picking a date on your form will only see time slots within your working hours.
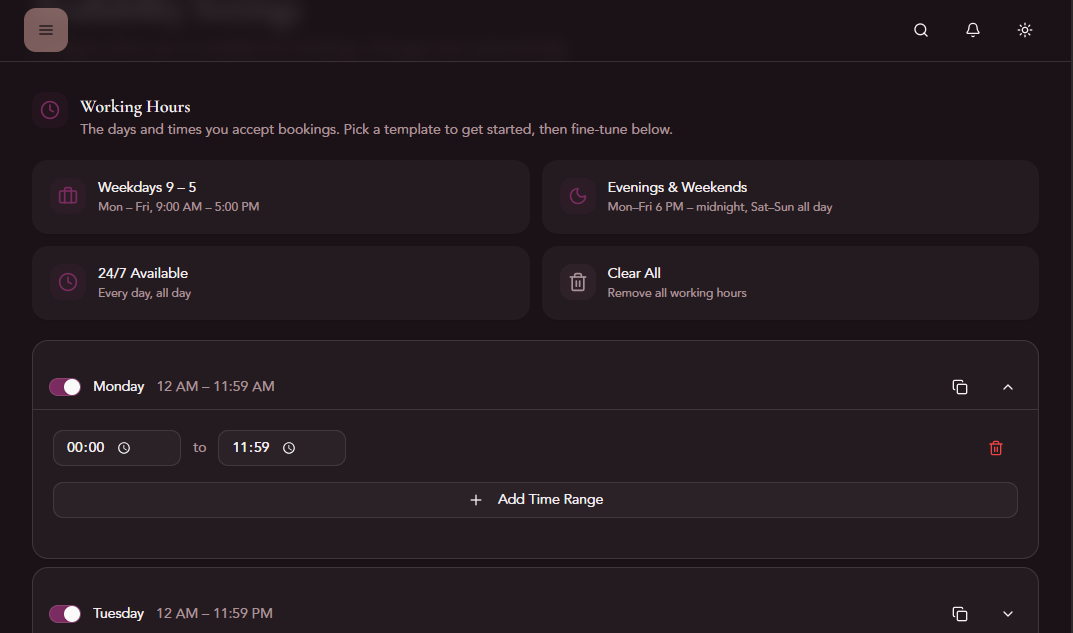
You can set it however you work:
- Specific days and hours — e.g., Tuesday through Saturday, 10am to 10pm. Click on each day to toggle it on or off, then set your start and end times.
- 24/7 — if you don't want to restrict it, just leave all days enabled with full hours.
- Block specific dates — scroll down to the blocked dates section. Add holidays, days off, or that weekend you're going away. You can add a reason too, so you remember why you blocked it.
There's also a buffer time setting — how much time you want between bookings. Default is 30 minutes. If you need more transition time, bump it up.
And if you ever need a break, go to Settings → Business Rules card and toggle on hiatus mode. It pauses everything — the form shows a message, the AI stops booking, your calendar goes quiet. One click on, one click off.
Step 4: Teach the AI your rules
Click your name in the bottom left → Settings → Concierge AI card. Scroll past the email alias section to the FAQ section.
This is where you tell the AI how to answer common questions. Click Add FAQ and enter a question-answer pair:
- "Where are you located?" → "I'm based in [city], available for incall at my private residence and outcall within the city centre."
- "What are your rates?" → "My rates start at [X] for [duration]. Full details are on my website."
- "Do you offer [specific service]?" → Whatever your answer is.
- "What's your cancellation policy?" → "I require [X] hours notice..."
Here's what I did: I went through my phone and copied every templated reply I'd ever saved — the messages I send over and over to the same questions. Pasted them all in as FAQs. Took about five minutes and it saved me from ever typing those replies again.
The AI uses these FAQs as its knowledge base. When a client asks something that matches, it responds with your answer in your words. When it doesn't know something, it tells the client it'll check with you and flags it for your review.
While you're on the Concierge page, scroll back up to set the AI's personality — Sweet & Direct, Professional & Polished, Playful & Flirty, or Concise & Efficient. Pick whichever matches how you'd actually talk to clients.
Step 5: Add your rates and services
Click your name in the bottom left → Settings → Business Rules card. Scroll down to the Session Types section.
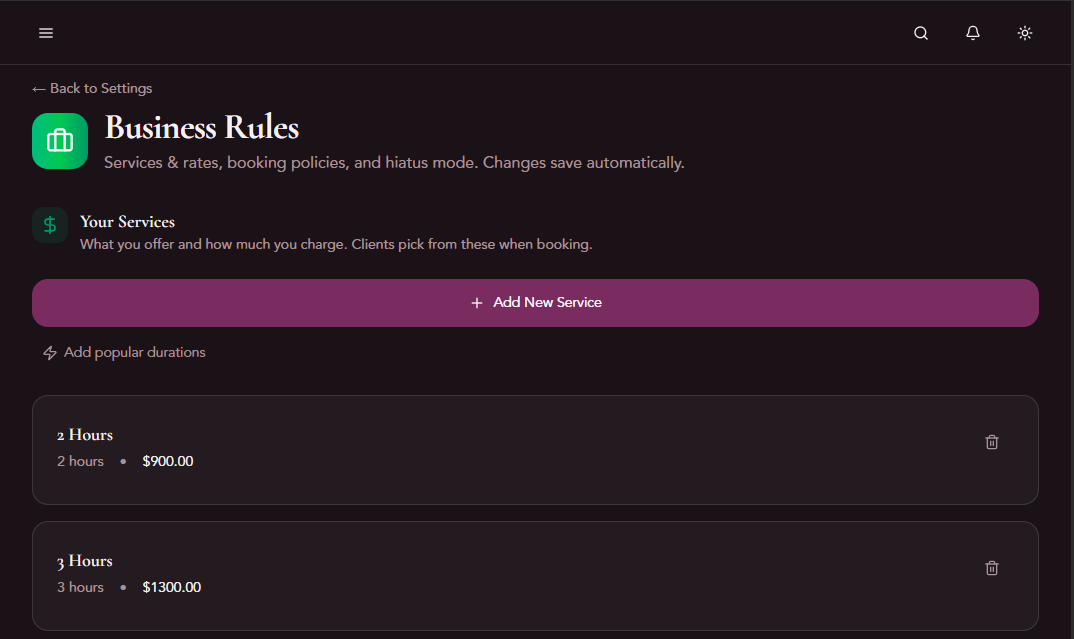
Click Add Session Type and fill in:
- A name (e.g., "One Hour Date", "Extended Evening", "Dinner Date")
- Duration
- Rate
- Whether it's active or paused
The booking form and AI use this list to show clients what's available.
If you'd rather not display rates on your form — some girls prefer to keep pricing off the form and discuss it privately — you can disable rate visibility in your form settings. The form will still show durations and session types, just without the numbers.
I'll be honest: the rates system is still something I'm refining. There are a lot of ways people structure their pricing — by duration, by type, tiered rates for regulars, travel fees for outcalls — and I'm still figuring out the best way to handle all of it cleanly. If you have ideas or run into something that doesn't fit, tell me. This is exactly the kind of feedback that shapes what gets built next.
Step 6: Test it before you go live
Before you send your form link to anyone, send it to yourself.
- Go to Forms in the sidebar, find your form, and click the external link icon to open its public page
- Fill it out as if you were a client — use a real email address you can check
- Go to Inbox in the sidebar — the submission should appear within seconds
- If you have the AI on, try emailing your
@blushdesk.chaddress with a question from your FAQ list and see how it responds
This takes two minutes and it'll give you confidence that everything works before a real client touches it.
You're live
That's it. You have a booking form with built-in screening, a private email, availability settings, an AI that knows your FAQ, and your rates configured. Share your form link on your website, your socials, or wherever clients find you.
The whole dashboard is yours to explore — The Agenda in the sidebar shows a calendar view of your bookings, BlushNotes is your client CRM where profiles build up automatically over time, and Inbox keeps form submissions and emails together in one place.
If anything is confusing, broken, or just not quite right — I want to hear about it. Hit reply on the email, DM me, or use the contact page. I built this for us, and the only way it gets better is if you tell me what's missing.
---
New to BlushDesk? Sign up here — setup takes about 10 minutes and you can try everything free.
Enjoyed this article?
Get new posts delivered to your inbox.